Our Club Kids explored the sweet side of science! Make Rock Candy
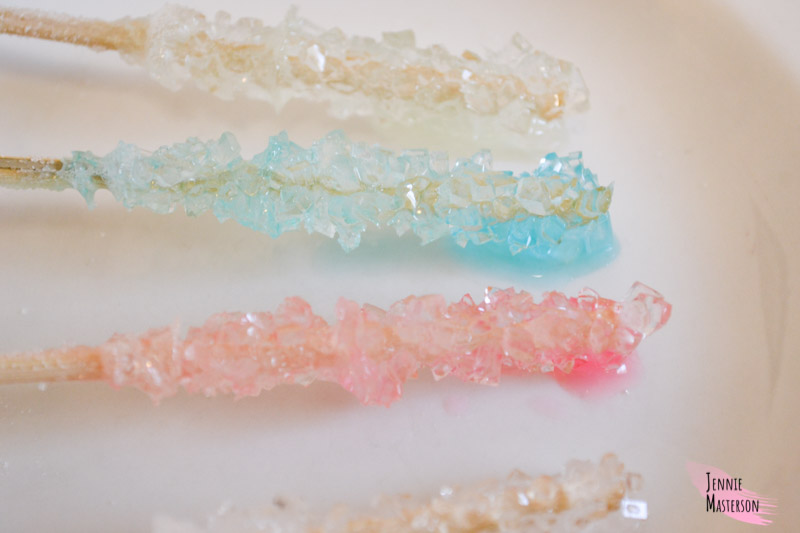
Our Club Kids explored the sweet side of science! This simple Rock Candy experiment was a mix of scientific processes and art. Students were able to make vibrant candy in various shapes, sizes and colors.
This experiment is for our older elementary Club Kids to practice the Scientific Method and learn some basic chemistry principles.
Instructions:
Candy and crystals both make me happy, and putting them together in the same project is even better. Sugar crystals, or rock candy as it’s often called, is really easy to make, fun to watch grow, and best of all it’s delicious.
This is a really great science experiment to do at home!
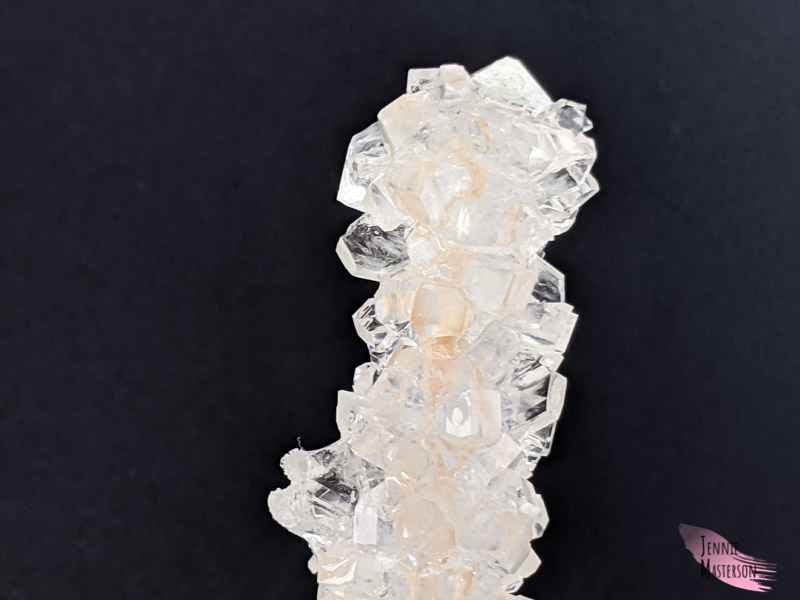
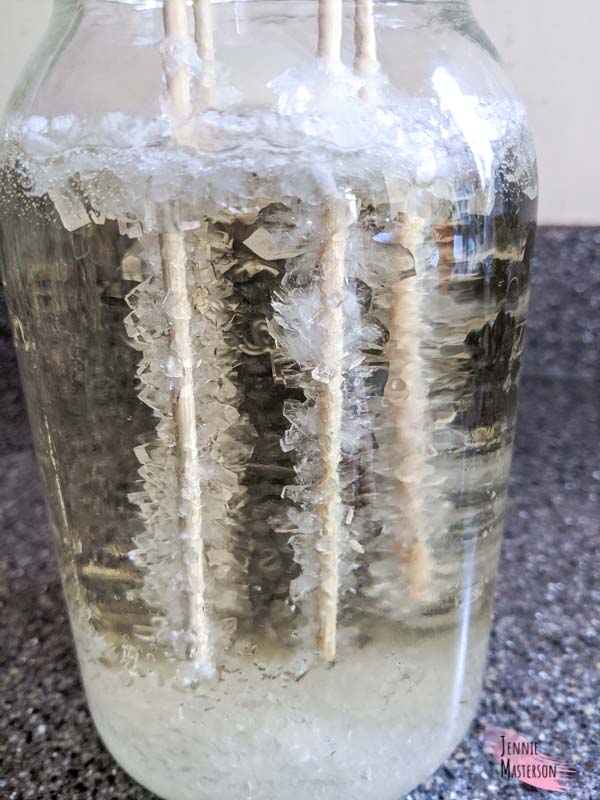
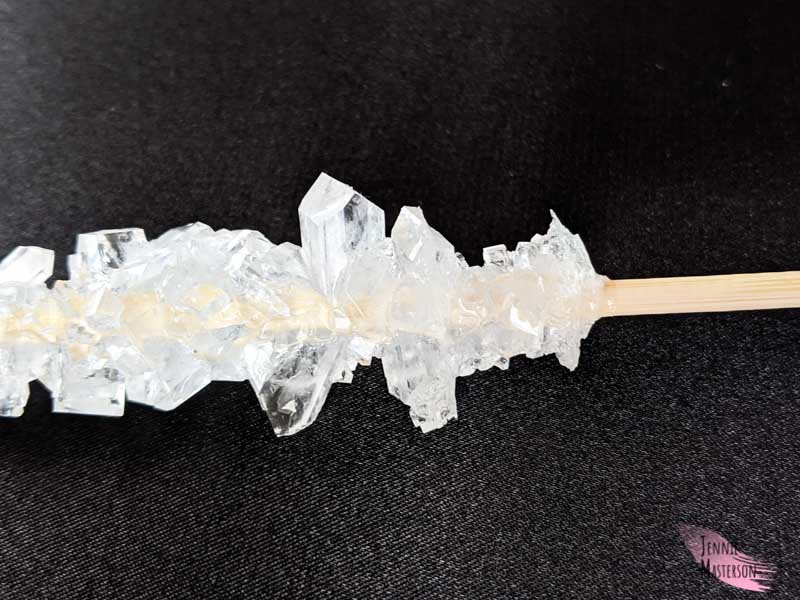
Sugar solution forms such interesting crystals. Here are a few individual chunks that grew on the top of my mason jar. Their crystalline geometry is similar to many gemstones you might find in nature.
To get started you’ll need a few things.
Supplies:
- 1 small to medium pot (for boiling water)
- 1 mason jar (1qt)
- 1 ½ cups water
- 4 cups sugar
- 4 skewers
- 4 clothespins
- Food coloring (optional)
- ½ tsp Flavoring (optional, ex. Strawberry extract, vanilla extract, etc)
Note: This post will make four rock candy sticks. If you want to make more, you will need additional supplies. (skewers, clothes pins etc.)
This recipe can easily be doubled or tripled in order to have different flavors and colors.
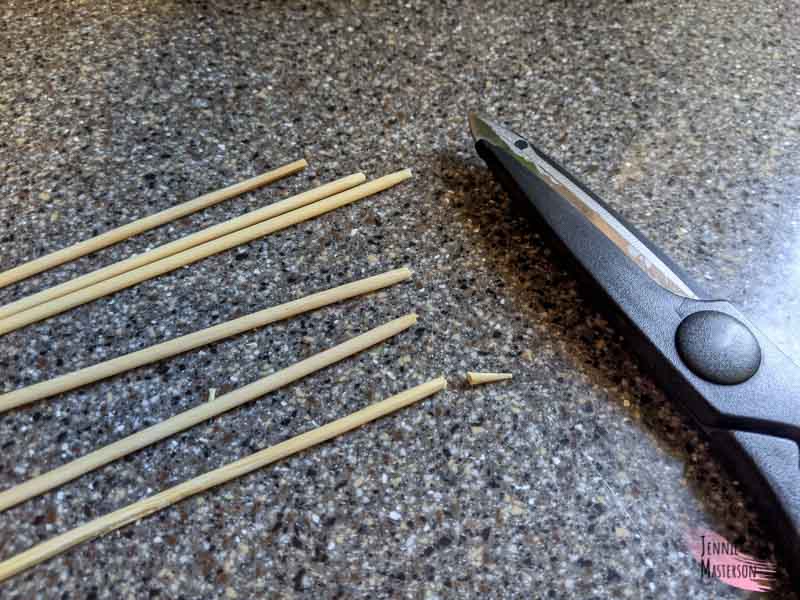
Prepping the Sticks
Skewers by default have a very sharp end. This will need to be trimmed to make sure that no one’s hands or mouths get poked. You can use a heavy pair of scissors or a knife to trim the sharp tips off. Feel free to use a little bit of sandpaper to finish smoothing it if the end still feels too rough.
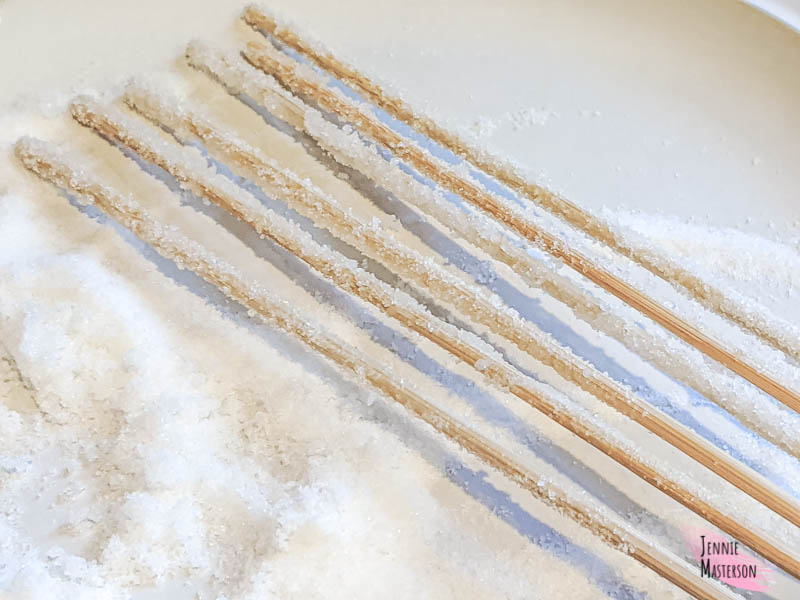
Once the skewers have been trimmed fill the mason jar with water and soak the skewers in it for an hour.

After they’ve soaked, coat them in sugar and allow them to dry. This coating will provide the seed crystals that our rock candy will grow on. This step is important so don’t skip it.
Rock Candy Crystal Solution
Add the 1½ cups of water to the pot. Heat it up until it starts boiling. Once it’s boiling remove it from the heat and gradually add 4 cups of the sugar and stir until it dissolves. If all of it dissolves continue adding sugar until it stops dissolving. Near the end it will take a long time for the sugar you add to dissolve.
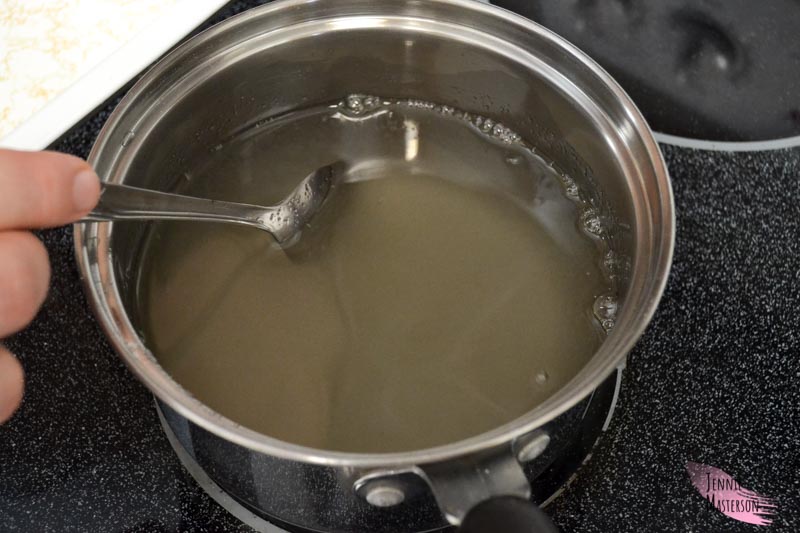
Sometimes when dissolving the sugar it will caramelize slightly and turn a little brown. This won’t significantly affect the crystals.
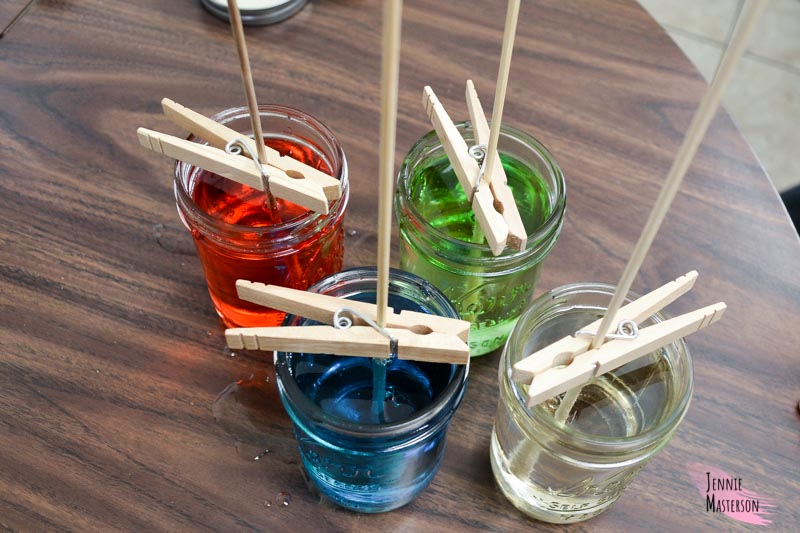
Now you can add several drops of food coloring and or some flavoring to the solution if you want. The crystals will come out much lighter than the color of the solution so you’ll want to add enough food coloring to make the solution deeply colored.
Growing the Rock Candy Crystals
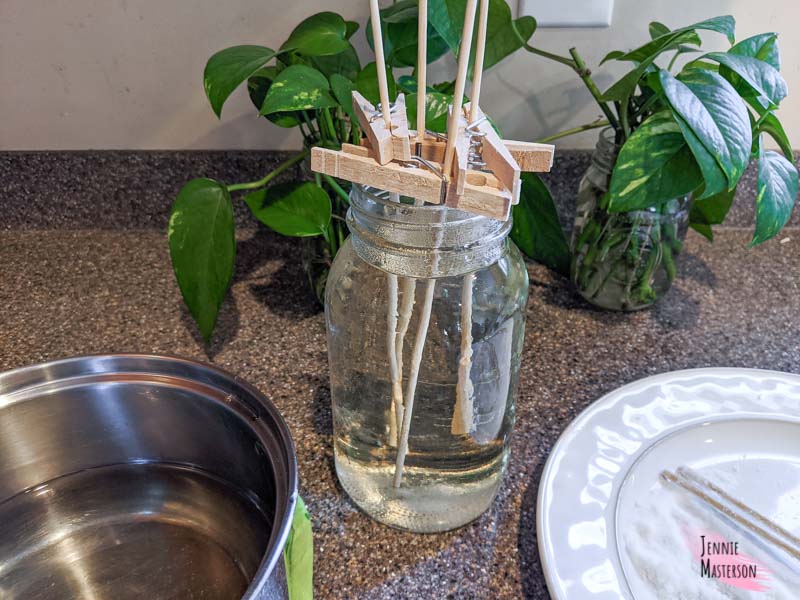
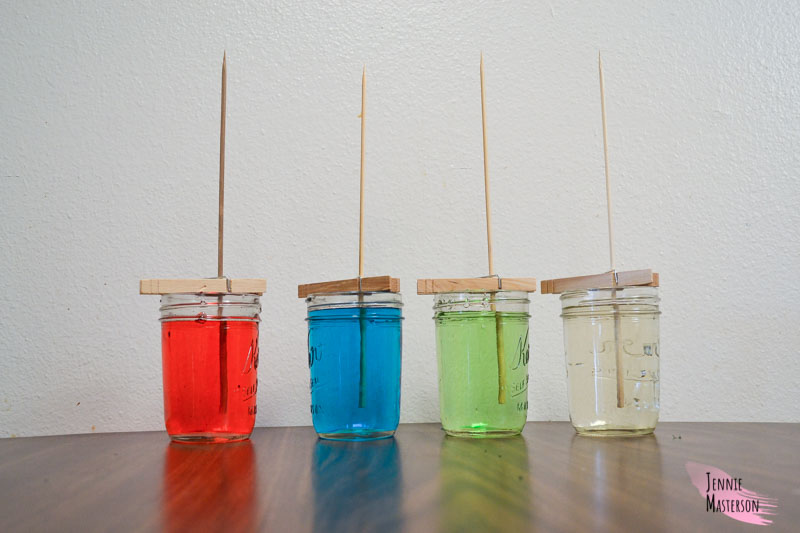
Carefully pour the crystal solution into the empty mason jar, and move it to the location where you’ll be letting the crystals grow. Be very careful when moving the filled jar. IT WILL BE VERY HOT!
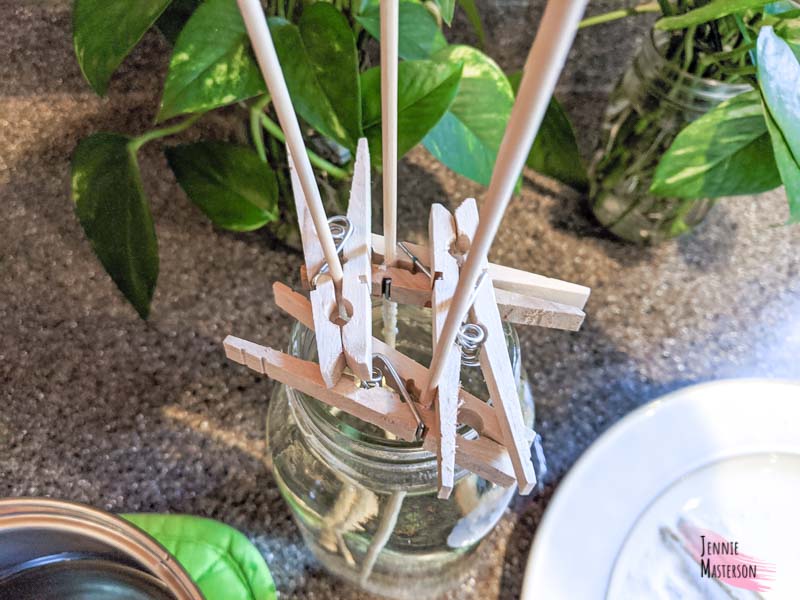
Once it’s in it’s final resting place. Clip the clothespins onto the skewers. You’ll want them to hang in the solution reaching down until they’re about 1 inch from the bottom of the jar.
Place the skewers into the jar. I stack them into a # shape. Some of the seed crystals may fall off the stick, and that’s fine.
Now all you have to do is wait and watch the crystals grow. It’s best not to move them while they’re growing. I’ll often wait about a week for them to grow before I become too impatient and pull them out. However you can wait as long as you’d like. The longer you leave them in the solution the larger the crystals will grow.
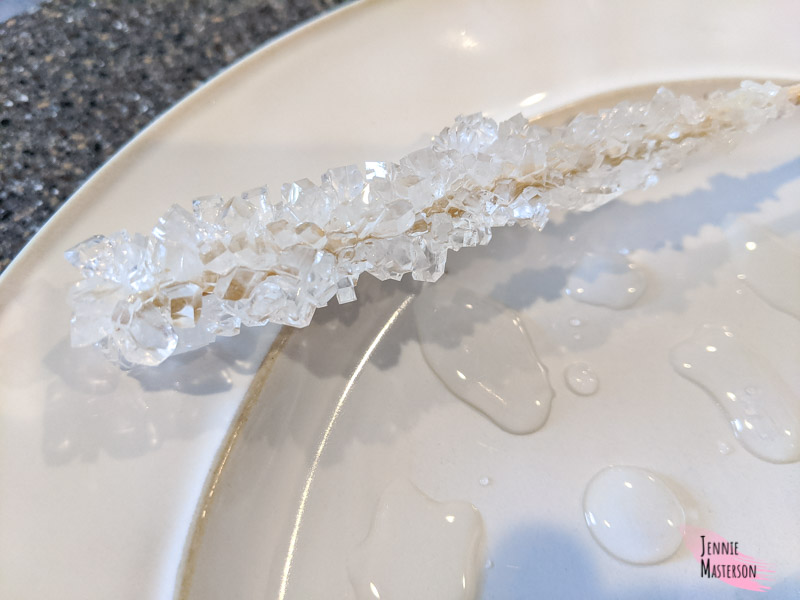
When you pull these out the solution will still be sticky. Use a plate or something else solid to let them dry on so they don’t stick to the drying surface.
You can also use separate mason jars if you want to grow multiple colors and flavors of rock candy at one time.
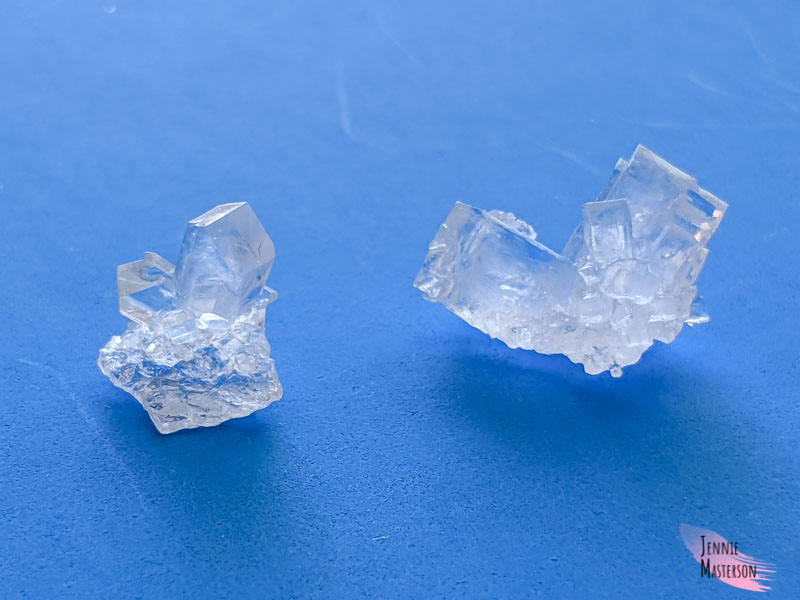
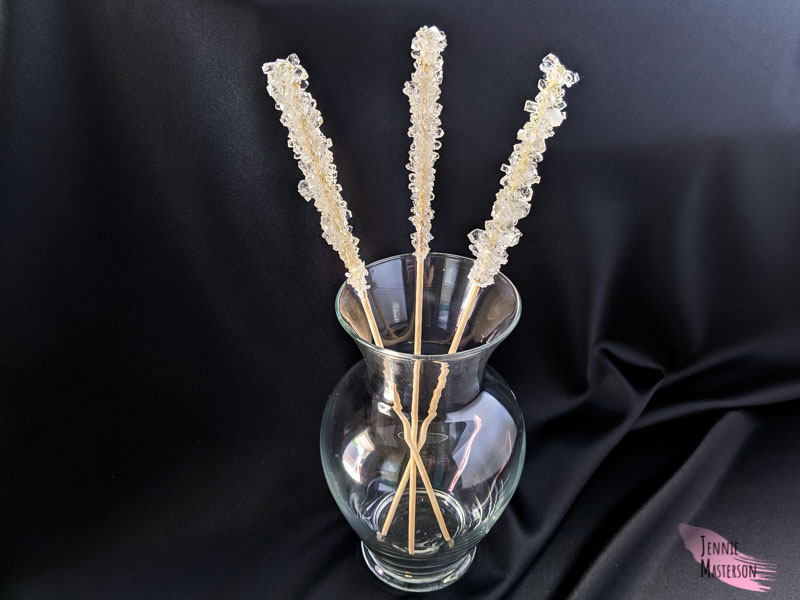
The colored ones are fun, but the white ones almost look like diamonds on a stick.
Thanks for reading!